Casted seats module
It is identified with the following icon:
The Gepetto module allows the design of a seat from a scan made to a mold with a “calergo” or vacuum bag. It is not a circularly shaped mold so it is not necessary to be “distilled” and therefore we can take it directly to the module.
Traslation
Go to Position 
Click on Traslation 
You will see a view of the three mold axes of the 3D shape of the seat, we can accommodate them by clicking on any of the white lines of separation, so we can better visualize each of the three views. For this, we must “click” on any part of the white line by dragging it.
In any of the three views, we can modify the position of the 3D shape. Clicking on any of the three views will activate the shape (the 3D shape will be colored yellow).
To rotate it, after activating it, we will use the mouse wheel forwards or backward. We will see how the angle in the reference marker varies.
To move it, after activating it, we must press the right mouse button and hold it down we will drag the shape to the desired position.
After the change is made, you must validate it or not by clicking on ![]()
Finally you must save the change by clicking on 
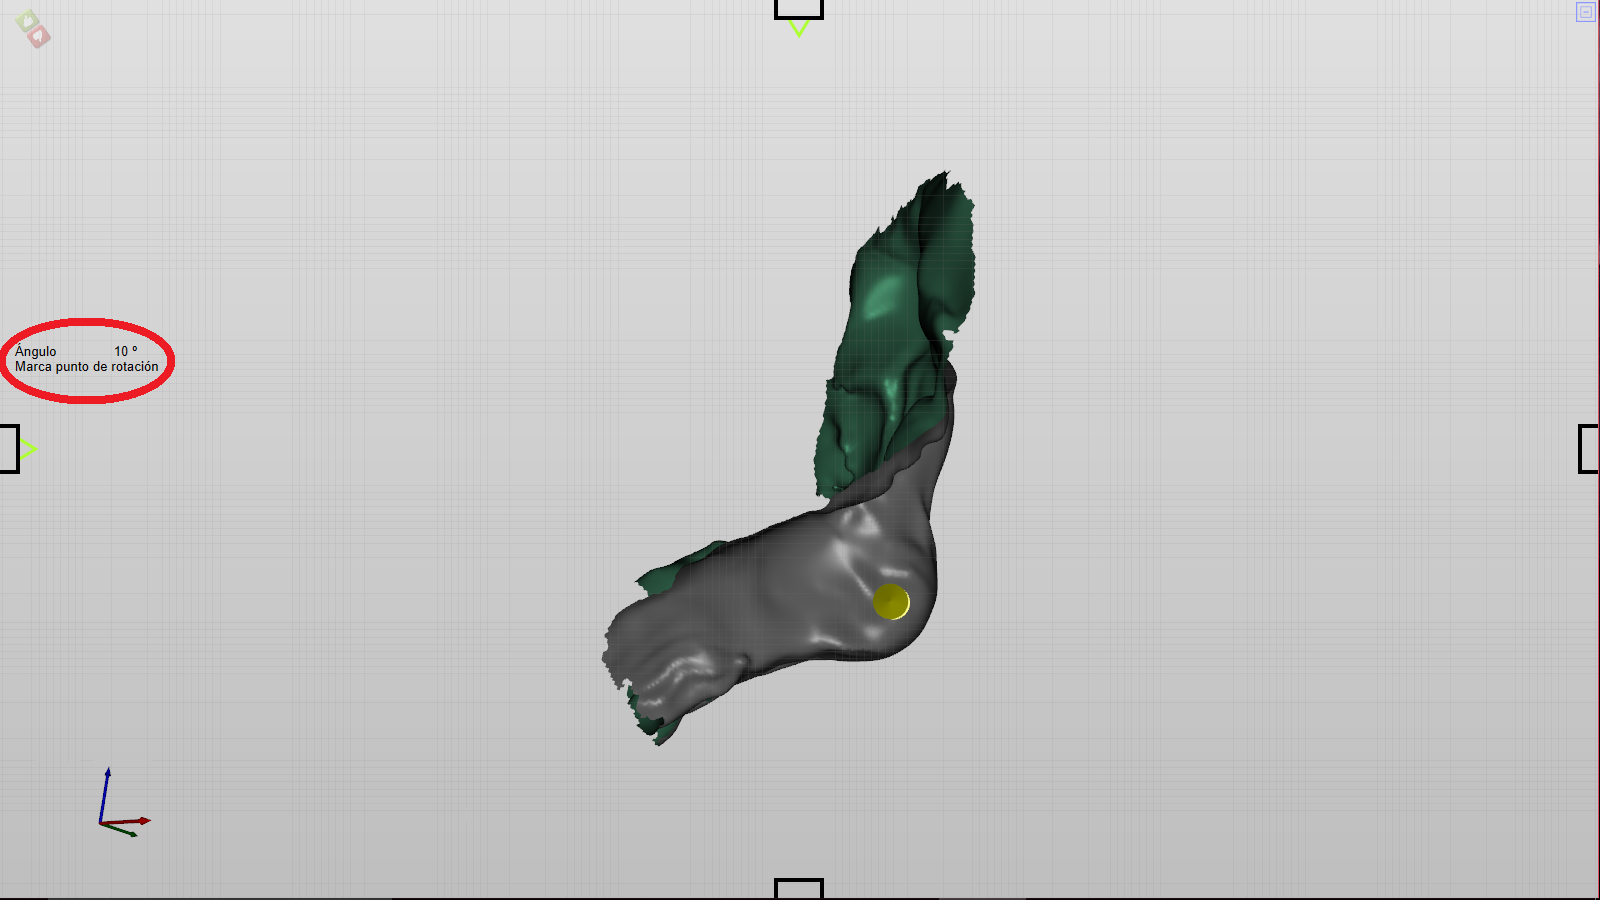
Recline
Go to Position
Click on Recline ![]()
The display will change to an icon that will represent the point that will be the axis for which we will vary the angle of the seat.
![]()
Placing the seat in a side view, we will mark the point where we want to place the axis.
We can reposition the axis, “click” on the axis with the left mouse button and drag it to the desired position.
When the axis is set to the desired position, press the control key  and holding it down, slide the mouse wheel
 up or down to vary the angle of the recline.
You can track and measure the angle variation in the marker that appears on the left side of the screen.
After the change is made, you must validate it or not by clicking on ![]()
Finally you must save the change by clicking on
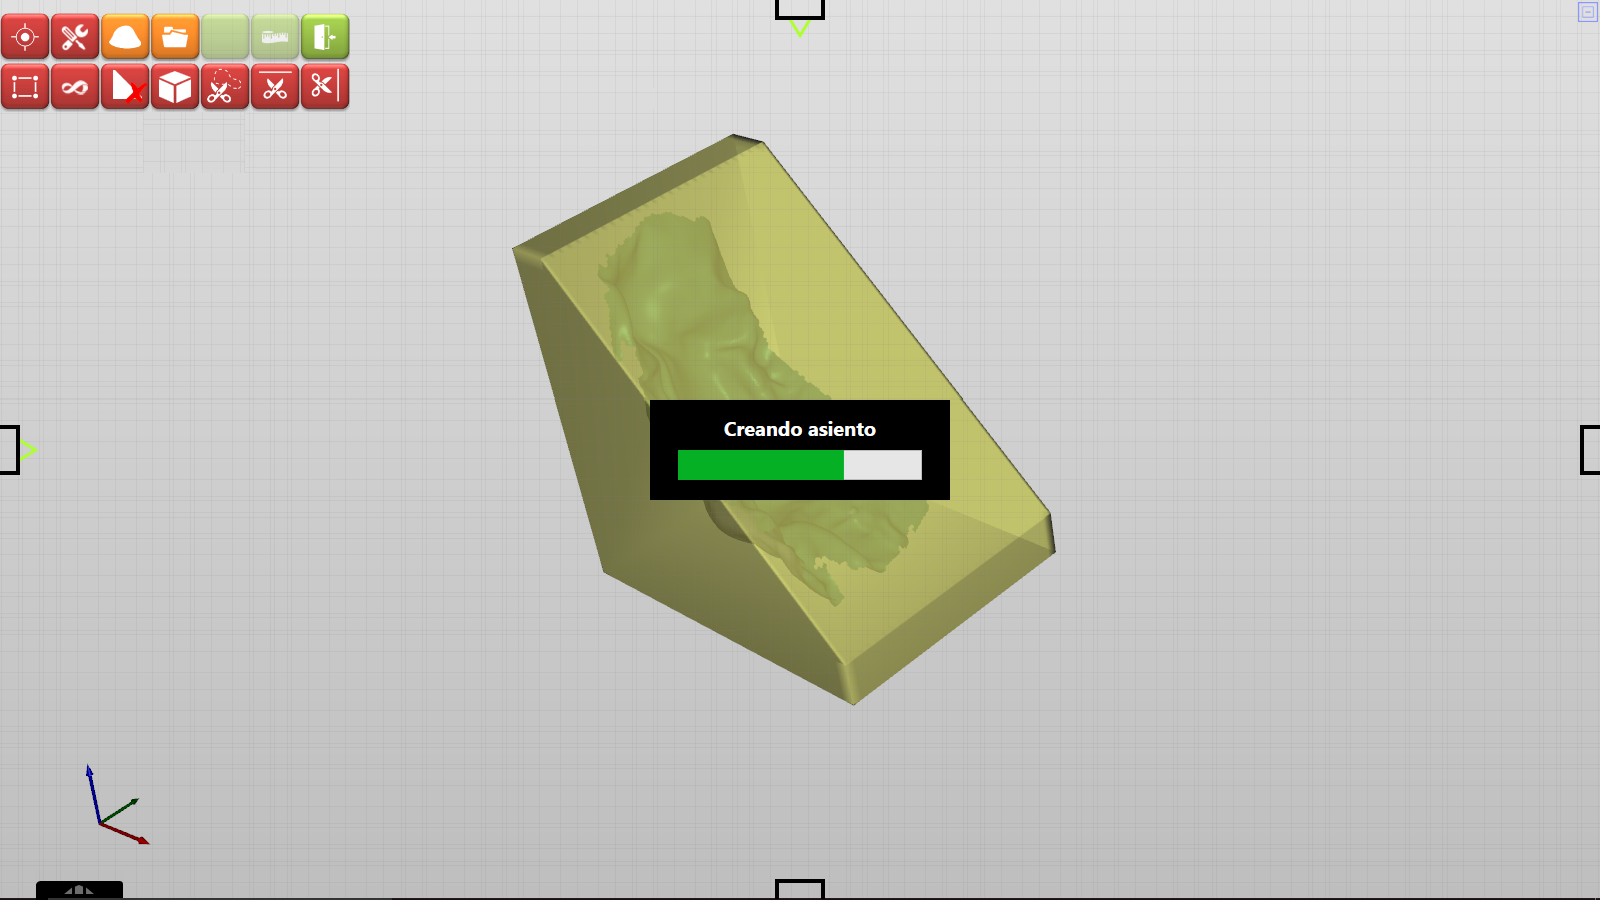
Add Block
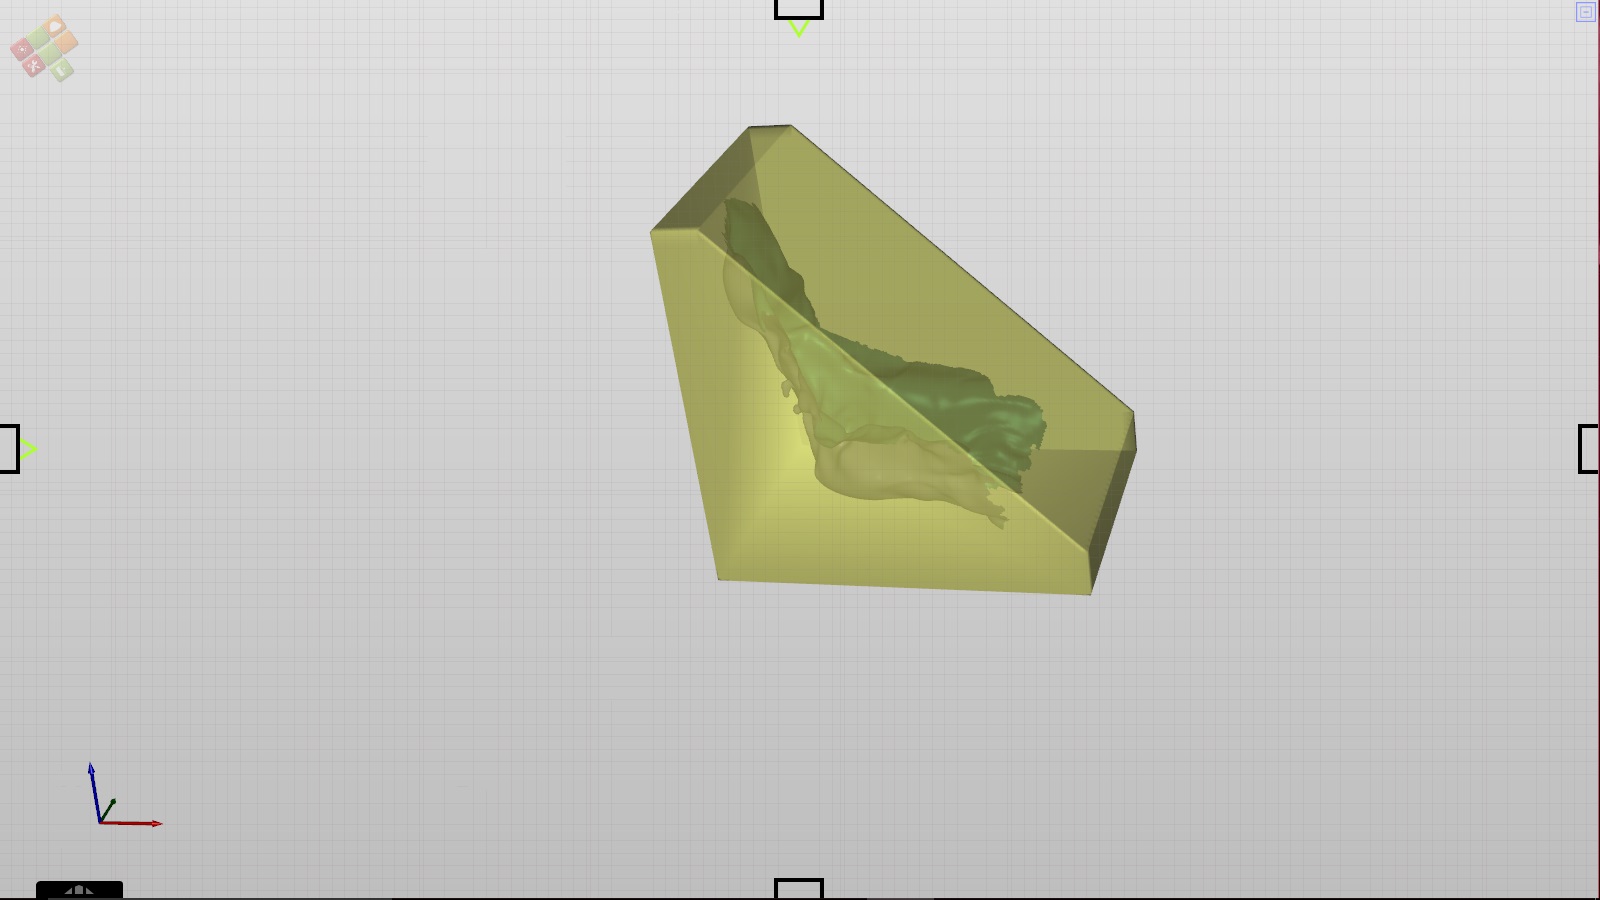
The milling of a foam seat is done with a robot in a foam block, of different densities, but of the same dimension. The shape of the block will be a triangle whose measures of the “hicks” will be 80 cm each, while the width will be 60 cm.
The purpose of the tool will be to position our mold inside the block, in order to choose the correct tilt, as well as its vertical.
Go to Position
Click on Add Block ![]()
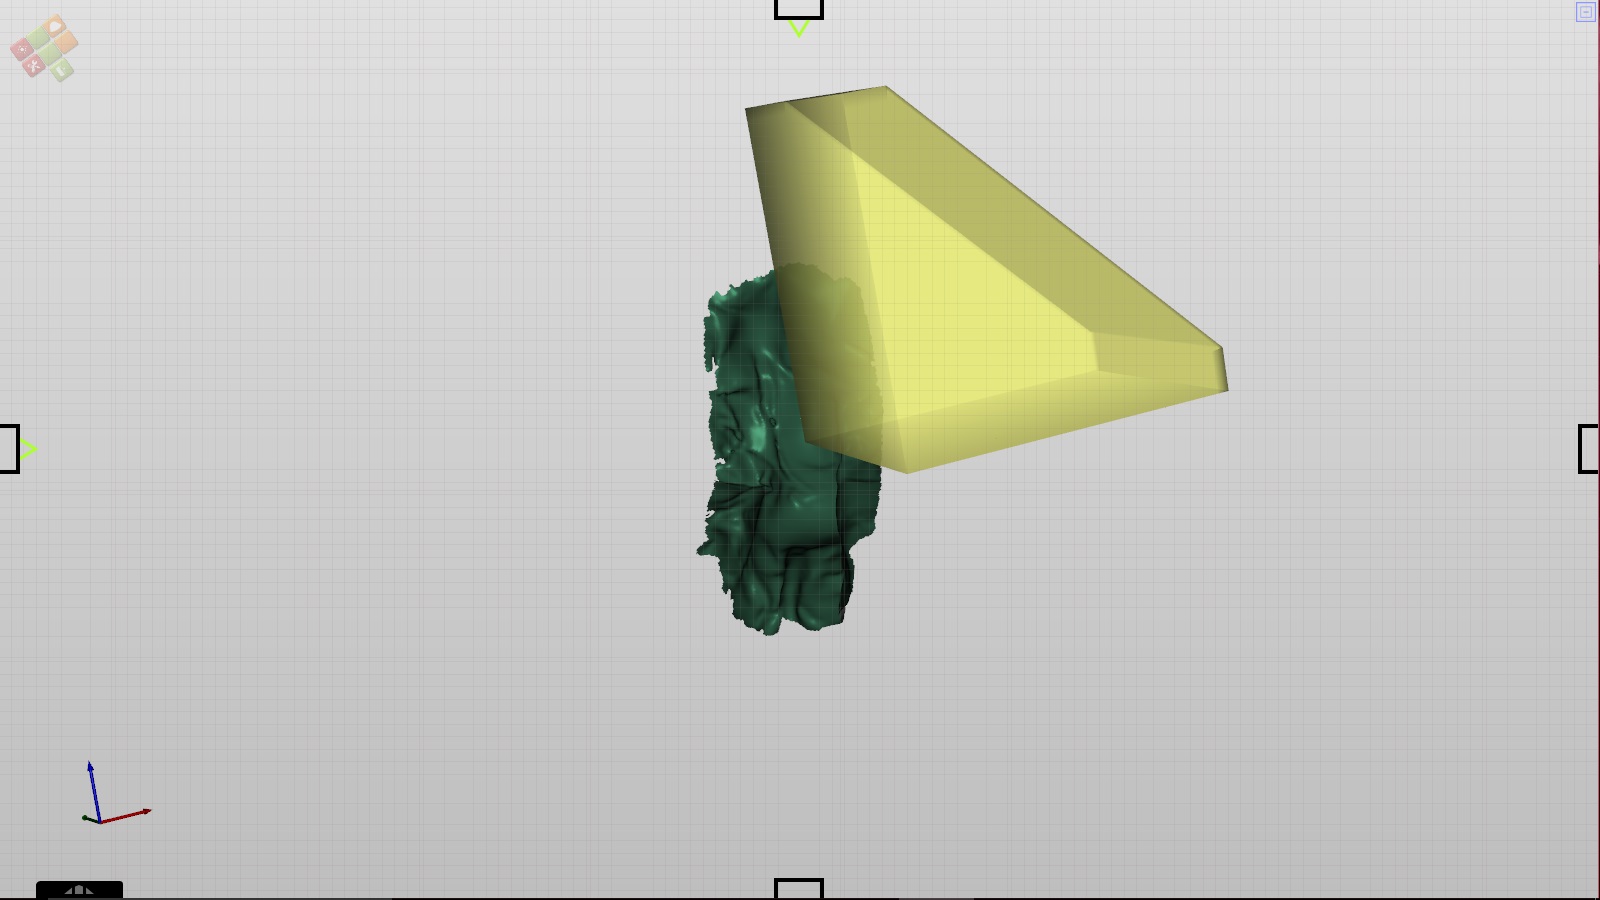
The foam block will appear. We will have on the screen two images, the mold of the seat and the block of foam that we are going to mill, both in real size.
It is now necessary to insert the mold into the block and position it correctly.
To do this we must return to the Traslation tool. To follow the instructions of the commands please read this section.
After the change is made, you must validate it or not by clicking on ![]()
Finally you must save the change by clicking on
Merger
After the positioning of the mold inside the foam block, the image will appear as follows:
Now we must make the merging of the two files:
Go to Position
Click on Merger ![]()